Getting Started
For background information, see the What is Beszel? page.
1. Start the hub
The hub can be run with a single binary file or with Docker / Podman.
Click to view complete docker-compose.yml config including local agent
IMPORTANT
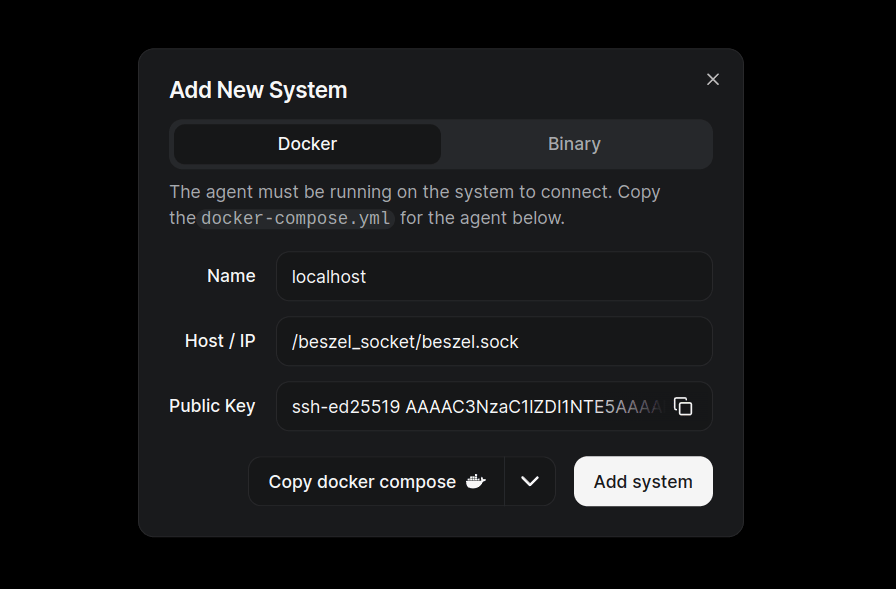
This configuration should work out of the box, but you must follow these steps when adding the system in the web UI:
- Update the
KEYandTOKENenvironment variables with your public key and token, then restart the agent:
docker compose up -d- Use the unix socket path as the Host / IP in the web UI:
/beszel_socket/beszel.sockservices:
beszel:
image: henrygd/beszel:latest
container_name: beszel
restart: unless-stopped
environment:
APP_URL: http://localhost:8090
ports:
- 8090:8090
volumes:
- ./beszel_data:/beszel_data
- ./beszel_socket:/beszel_socket
beszel-agent:
image: henrygd/beszel-agent:latest
container_name: beszel-agent
restart: unless-stopped
network_mode: host
volumes:
- ./beszel_agent_data:/var/lib/beszel-agent
- ./beszel_socket:/beszel_socket
- /var/run/docker.sock:/var/run/docker.sock:ro
environment:
LISTEN: /beszel_socket/beszel.sock
HUB_URL: http://localhost:8090
TOKEN: <token>
KEY: "<key>"Click to view instructions for running docker compose
NOTE
If you prefer to set up containers in a different way, please feel free to do so.
Install Docker and Docker Compose if you haven't already.
Copy the
docker-compose.ymlcontent.Create a directory somewhere to store the
docker-compose.ymlfile.
mkdir beszel
cd beszel- Create a
docker-compose.ymlfile, paste in the content, and save it.
nano docker-compose.ymlvim docker-compose.ymlemacs docker-compose.ymlcode docker-compose.ymlChange the
APP_URLenvironment variable to the URL you’ll use to access the Hub (for example, a domain name or public IP including port if needed)Start the service.
docker compose up -d2. Create an admin user
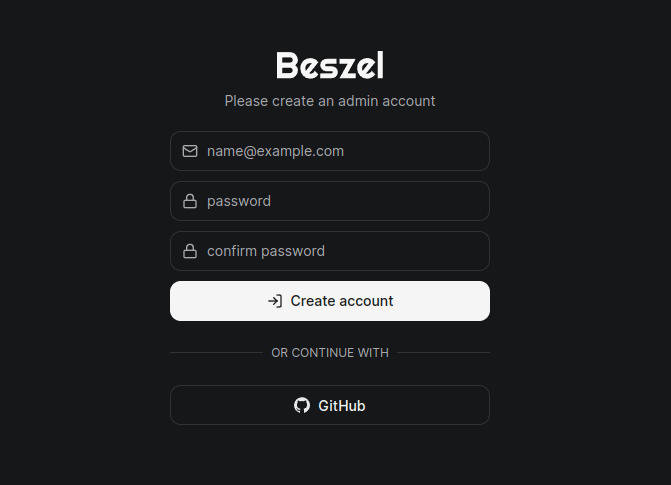
After starting the hub, navigate to http://localhost:8090 or your chosen address.
You will be prompted to create an account:

3. Configure your first system
Click the Add System button in the top right corner to open the system creation dialog. We're using a local unix socket in this example, but you can use a remote agent instead.
Note: As of 0.12.0, you can also use a universal token (
/settings/tokens) to connect the agent to the hub without needing to configure it ahead of time.

4. Start the agent
Docker instructions
NOTE
If you prefer to set up containers in a different way, please feel free to do so.
Copy the
docker-compose.ymlcontent from the Add System dialog.Create a directory somewhere to store the agent's
docker-compose.ymlfile.
mkdir beszel-agent
cd beszel-agent- Create a
docker-compose.ymlfile and paste in the content provided in the Add System dialog.
nano docker-compose.ymlvim docker-compose.ymlemacs docker-compose.ymlcode docker-compose.yml- Start the agent.
docker compose up -dBinary instructions
The install script is for Linux only
If you use a different OS, please manually download and run the correct binary for your system. See the Agent Installation page or the Compiling page for more information.
Copy the binary install command from the Add System dialog.
Open a terminal and run the command.
This will download the correct binary, create a user called beszel, and start the agent. It also creates a service to keep it running after reboot, and optionally enables automatic daily updates.
5. Finish adding the system
Now that the agent is running, click the Add System button in the dialog.
You will see the new system in table. If it flips to green, you're good to go.

If it changes to red, check the Common Issues page.